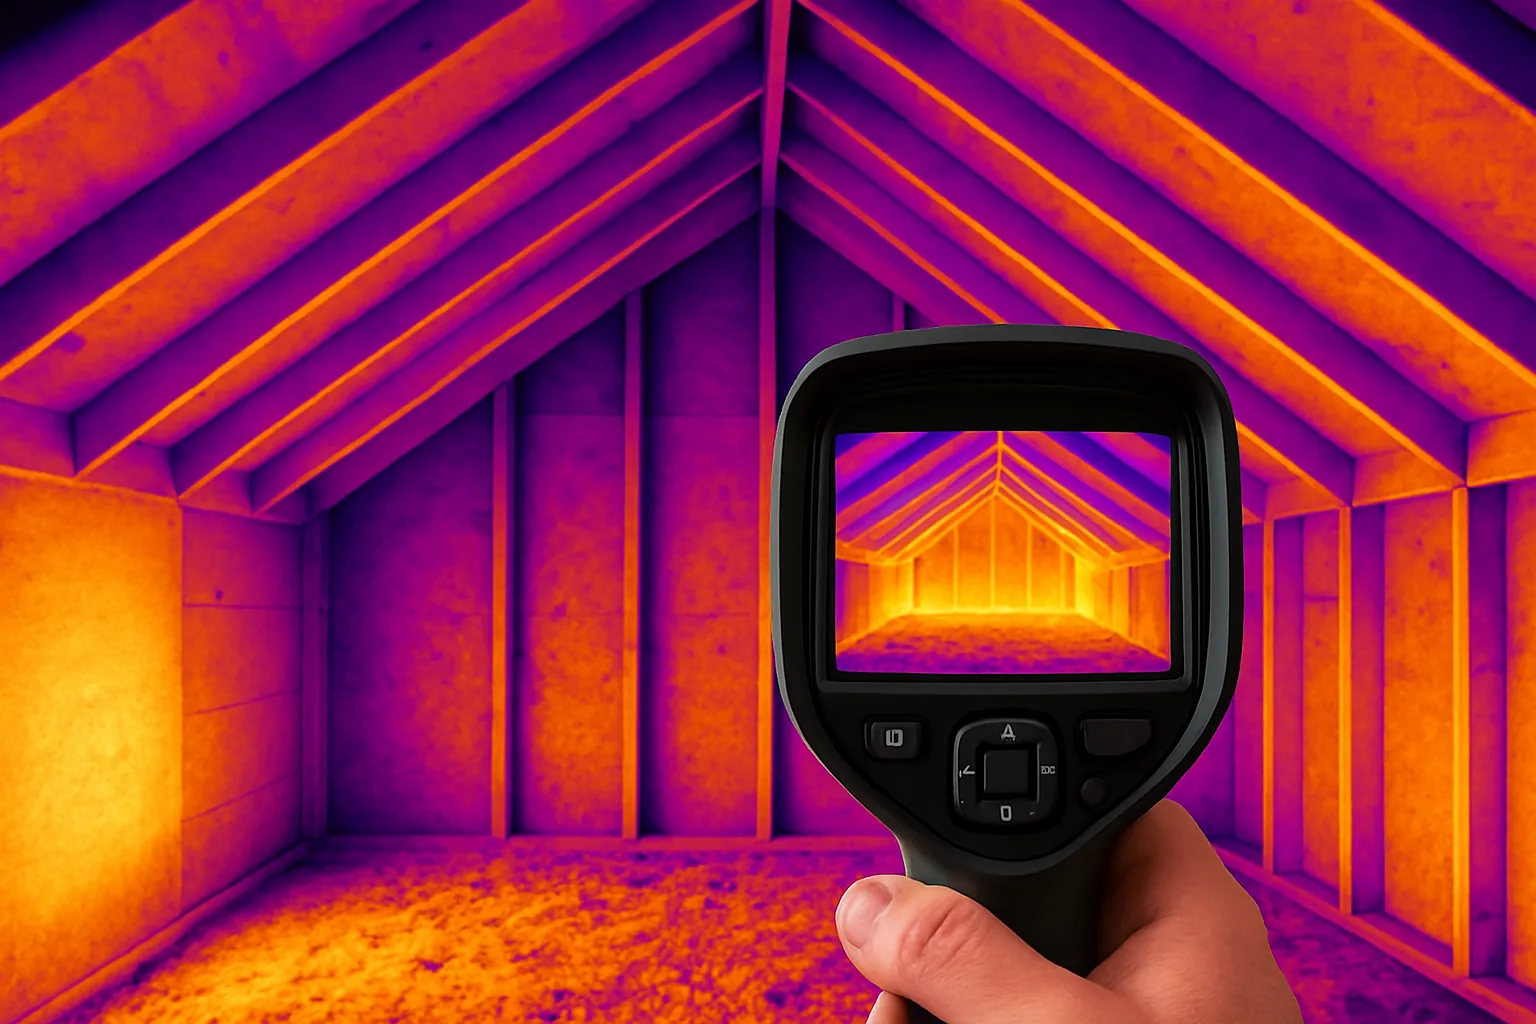
What thermal imaging reveals
Hidden moisture
Wet drywall and wet insulation read colder than dry surroundings. Slow leaks under sinks, behind tubs, around windows, and inside walls show up immediately on a thermal camera — often months or years before visible staining appears.
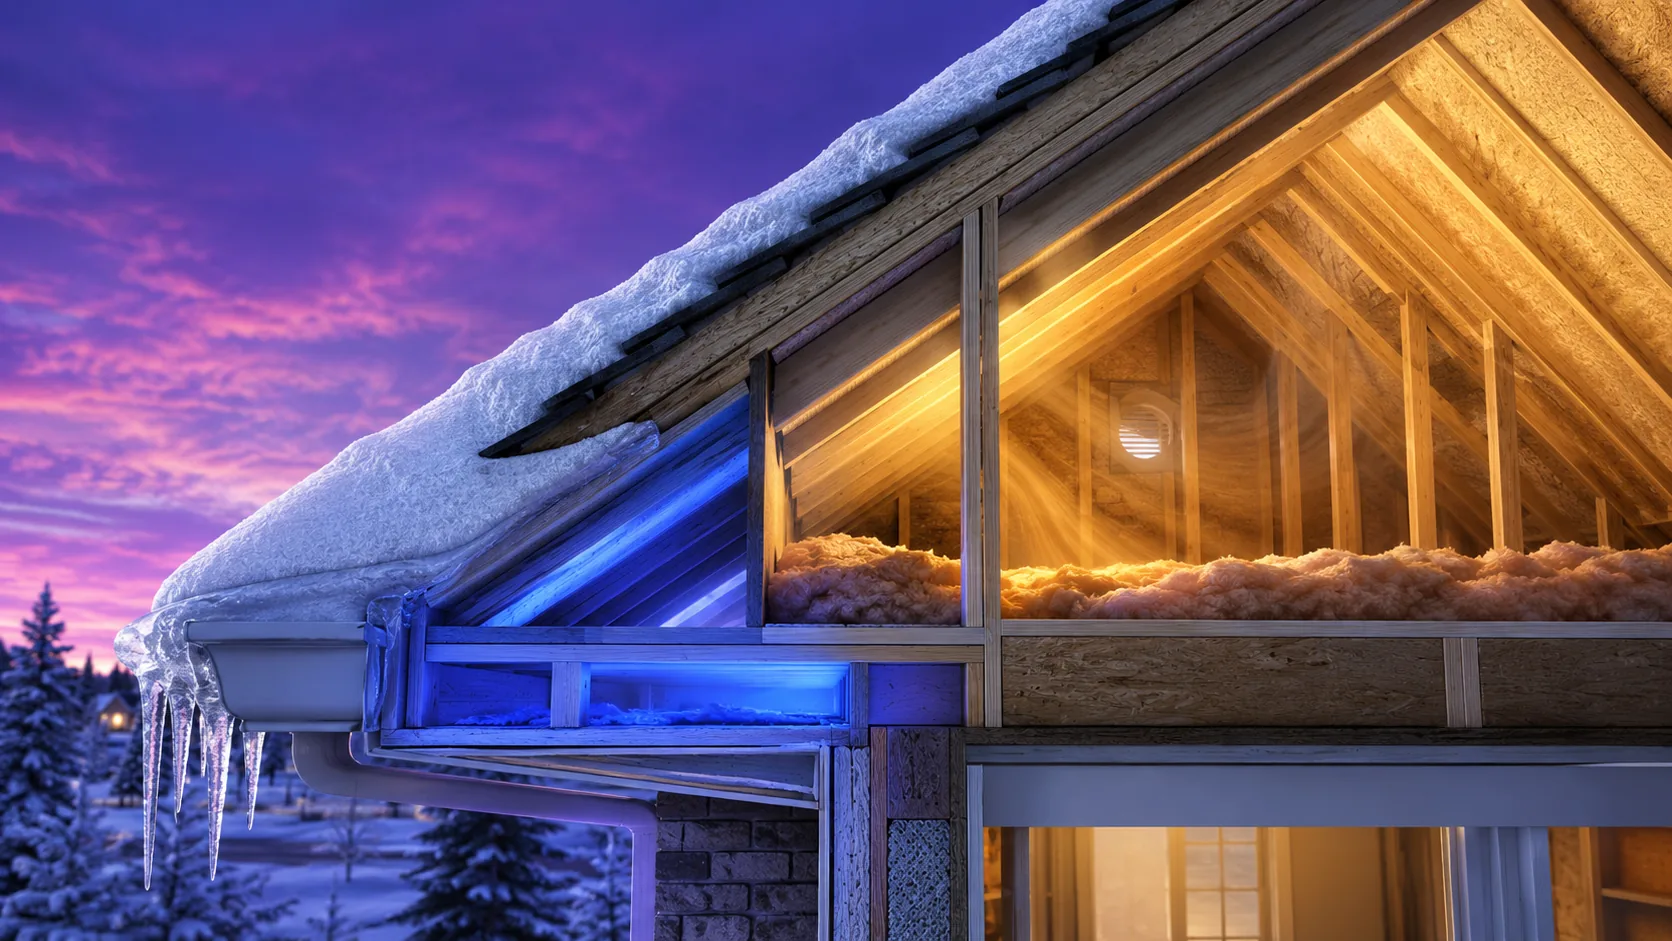
Missing or compressed insulation
Cold spots in winter (or hot spots in summer) reveal gaps, voids, settling, and areas where insulation was never installed correctly. Common in 1980s–90s Plymouth attics that were retrofitted with blown-in.
Electrical hot spots
Overloaded breakers, loose connections, and failing components run hot. Thermal imaging at the panel and key junctions identifies issues before they become fire hazards.
Air leaks & thermal bridging
Drafts around windows, doors, electrical penetrations, and rim joists show as cold streaks in winter. Critical for understanding why a Plymouth home runs cold in January.
Radiant heat & HVAC issues
Active in-floor radiant loops show on infrared. So do leaking ductwork, partially-closed dampers, and HVAC zoning failures.
How thermal imaging integrates with your inspection
Thermal imaging works best as an add-on to a full home inspection. The infrared camera is a diagnostic tool that complements visual inspection, moisture meters, and the inspector's experience. Used alone, infrared can produce false positives. Used together with a trained inspector's interpretation, it dramatically increases the value of your inspection.
Limitations of thermal imaging
To be transparent about what thermal imaging is NOT:
- It does not see through walls — it sees temperature differentials on surfaces
- It works best with at least 10°F temperature differential indoors vs. outdoors
- It cannot guarantee finding all moisture or all defects
- Findings always require interpretation by a trained inspector
We document every finding with both the infrared image and a matching visible-light photo for context.